> ## Documentation Index
> Fetch the complete documentation index at: https://support.locker.io/llms.txt
> Use this file to discover all available pages before exploring further.
# Set up Emergency Access
> Grant a trusted contact access to your vault in case of an emergency
Emergency Access allows you to grant another Locker user access to your vault in case of an emergency.
This feature is only available for **Premium** plan accounts and above.
## Emergency contact permissions
Depending on your configuration, a trusted contact can perform the following actions:
* **View only**: Can only view items in your vault.
* **Takeover**: Can create a new password or Master Password to gain permanent access to your vault.
***
## Setting up Emergency Access
You can only set up this feature through the **web app**.
### Invite an emergency contact
Log in to your Locker account in the browser. Go to `Settings` > `Security`.
Scroll down to the **Emergency Access** section and click `Add emergency contact`.
* **Email**: Enter the email address of your trusted person (must be an existing Locker user).
* **Access level**: Choose `View` or `Takeover`.
* **Wait time**: The amount of time the contact must wait before accessing your vault after sending a request.
Click `Add` to send the invitation.
 ***
## Managing access requests
When a trusted contact sends an access request, you will receive an email notification.
If you do not manually approve or reject the request, it will be **automatically approved** after the configured wait time expires.
### Handling existing requests
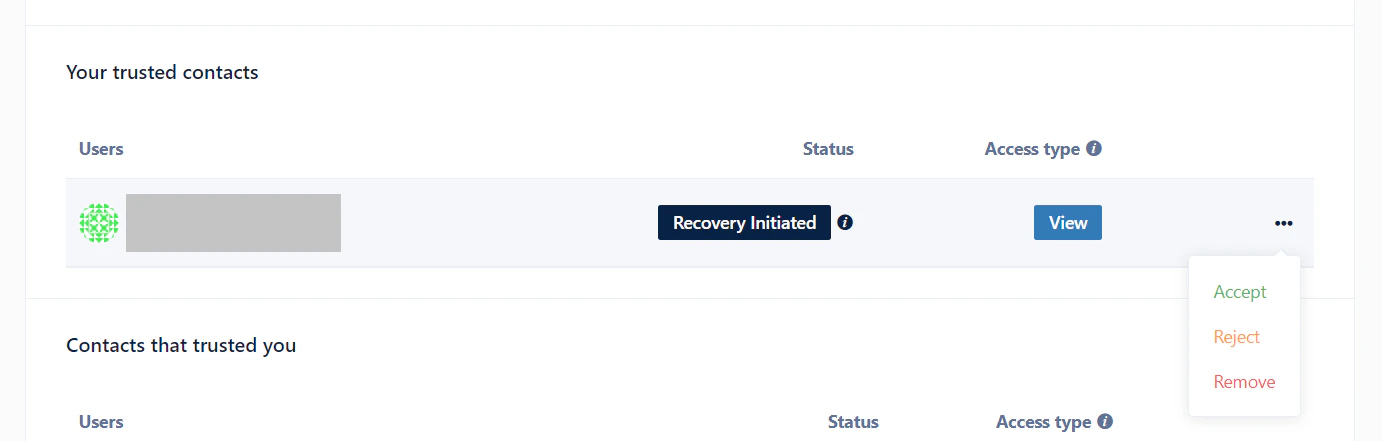
To approve or reject a request from a contact with the status **Recovery initiated**:
Go to `Settings` > `Security` > `Emergency Access`.
Click the three-dot button next to the contact and select:
* **Accept**: Allow them to view or take over your vault immediately.
* **Reject**: Cancel the current access request.
* **Remove**: Permanently remove this person from your trusted contacts list.
***
## Managing access requests
When a trusted contact sends an access request, you will receive an email notification.
If you do not manually approve or reject the request, it will be **automatically approved** after the configured wait time expires.
### Handling existing requests
To approve or reject a request from a contact with the status **Recovery initiated**:
Go to `Settings` > `Security` > `Emergency Access`.
Click the three-dot button next to the contact and select:
* **Accept**: Allow them to view or take over your vault immediately.
* **Reject**: Cancel the current access request.
* **Remove**: Permanently remove this person from your trusted contacts list.
 ### Revoking access
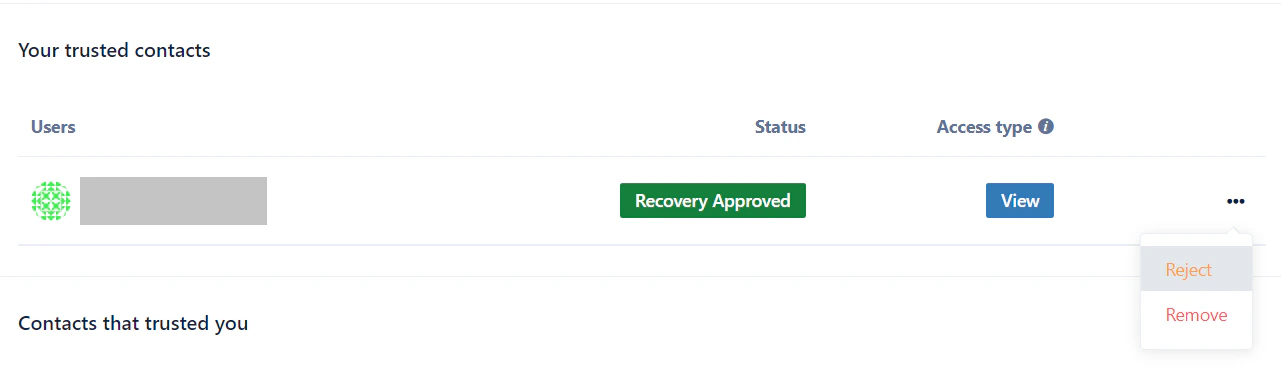
In the **Emergency Access** section, click the three-dot button next to the contact who currently has access.
Click `Reject` to revoke their access session.
### Revoking access
In the **Emergency Access** section, click the three-dot button next to the contact who currently has access.
Click `Reject` to revoke their access session.
 If the contact has **Takeover** permission and has already changed your Master Password, you will need to ask them for the new password before revoking their access.