Private Email is a useful tool to automatically generate masked email addresses to keep your true email address private. Locker Private Email even allows you to send/reply to emails via your alias rather than just receiving forwarded emails.
Here’s a brief guide on how to set up and use Private Email in Locker.
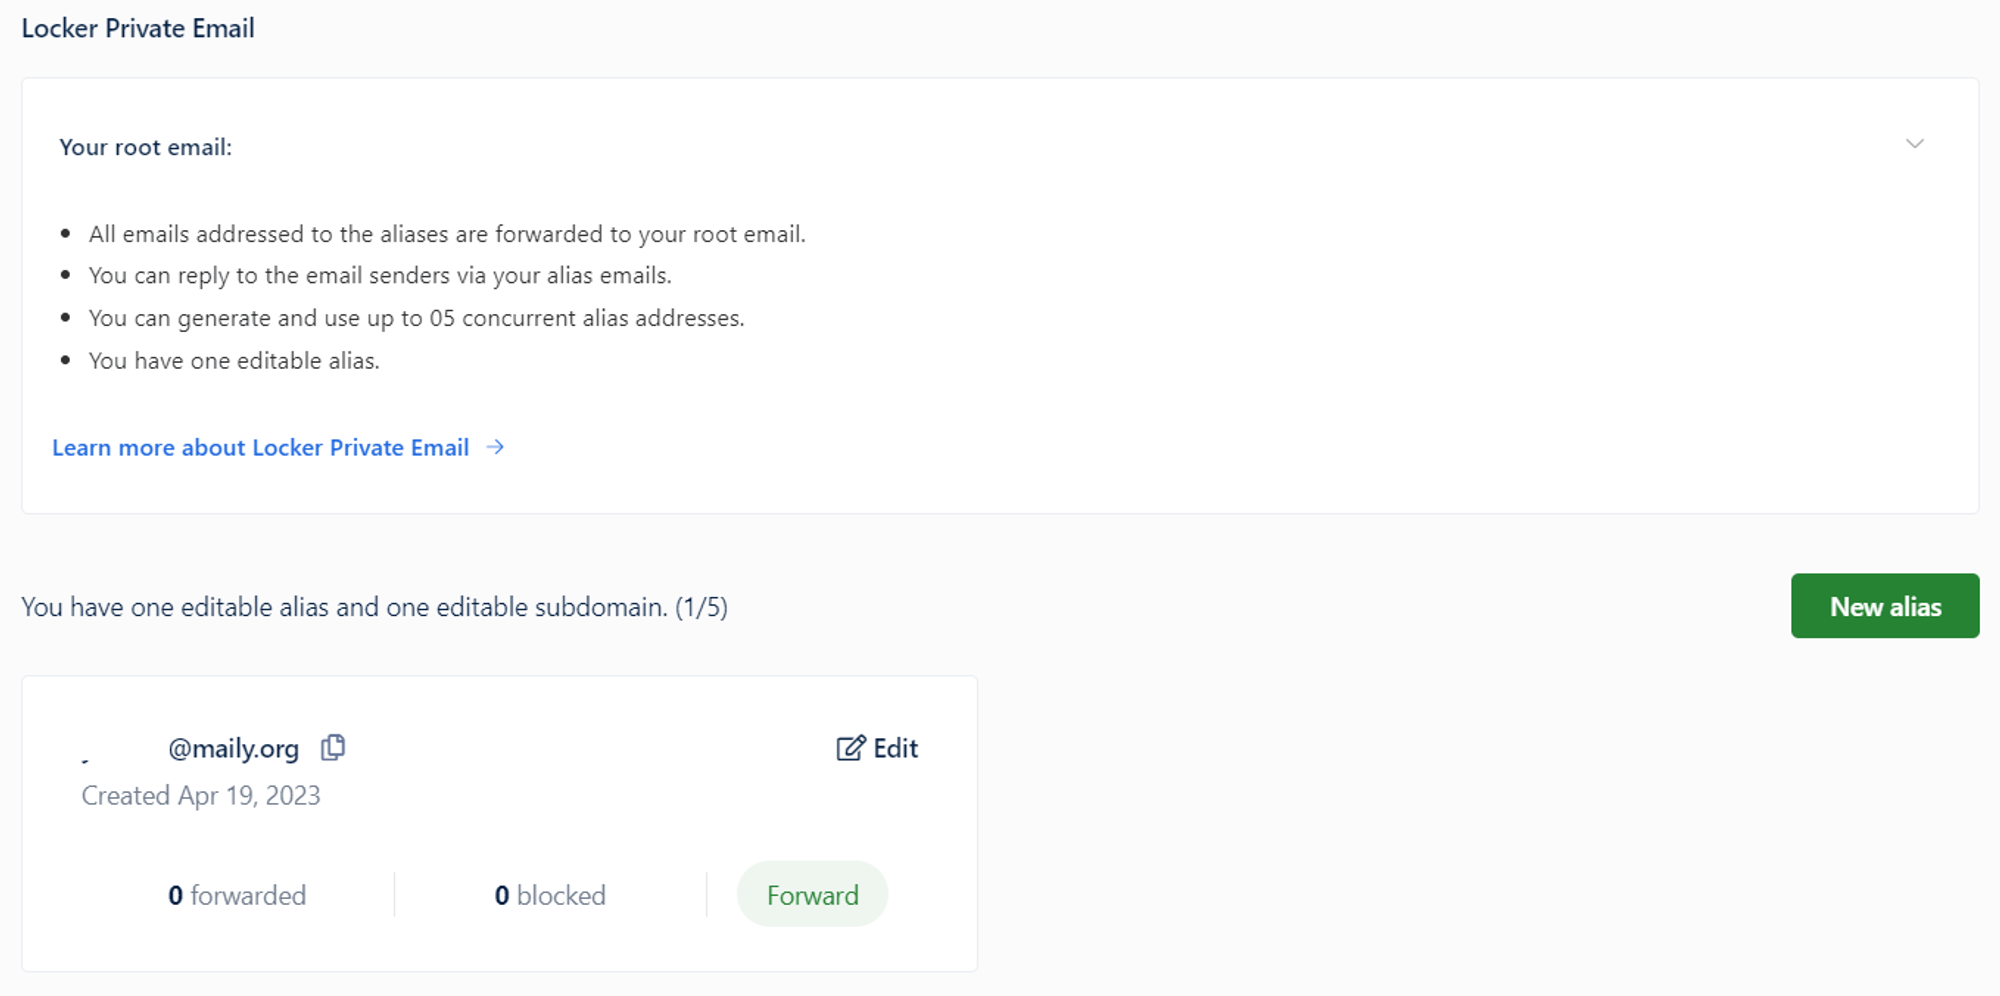
Click New alias to start creating a new alias. The system will automatically generate a new email address associated with your root email.
Click Edit to change the username of your alias if you want to. To delete an alias, click Delete.
Start using your alias to sign up for a new app or promotion. Any email sent to your alias will be forwarded to your root email.
Reply to Forwarded Emails
When you use your root email to reply to emails addressed to any of your aliases, the recipient will see a reply coming from the alias. Therefore, your root email address remains private.
Open the mailbox of your root address.
You will see emails forwarded from your alias in your inbox. Click that forwarded email and click Reply. Write your response and click Send.
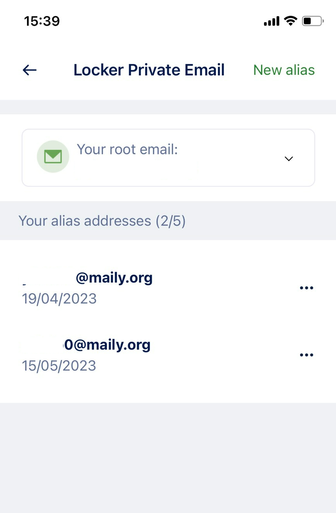
On Mobile device
Log in to Locker on your mobile device.
Tap Tools.
Tap Locker Private Email.
You can see all the aliases you have created on the screen and the number of aliases left. For example, 3/5 means you have created 3 aliases and there are only 2 remaining aliases available.
Tap New alias to create a new alias. The system will automatically generate a new email address associated with your root email.
To edit your first generated alias, click on the three-dot icon next to the alias. Tap Edit alias address and change to any name you want. To delete an alias, Tap Delete.
Start using your alias to sign up for a new app or promotion. Any email sent to your alias will be forwarded to your root email.

 Vietnamese
 No
No Yes
Yes