The email address used to register your account in Locker is automatically identified as your root email.
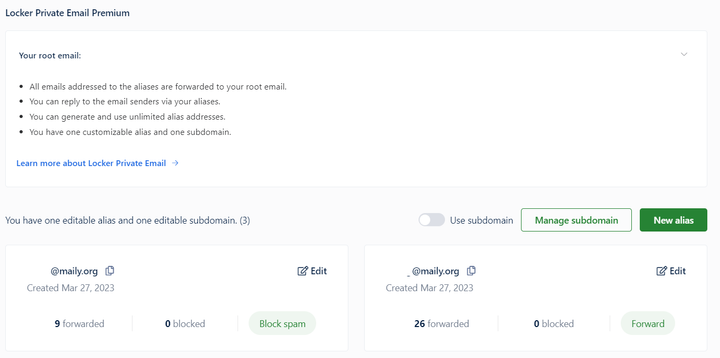
Below the root email, you can see the number of aliases you have generated. In the Premium plan, you can generate unlimited aliases, and have one editable alias and one subdomain.
📢
Note: If your subdomain is inactive for 90 consecutive days (no emails are sent to any address using that subdomain), it will be auto deleted, along with all emails associated with it.
Click New alias to start creating a new alias. The system will automatically generate a new email address associated with your root email.
Click Edit to change the username of the first generated alias if you want to. To delete an alias, click Delete.
Start using your alias to sign up for a new app or promotion. Any email sent to your alias is set to be forwarded to your root email as default.
Manage aliases from the dashboard
From your personal dashboard, you can clearly see all aliases with their statistics, including:
The number of emails forwarded to your root email from the alias
The number of emails blocked by the alias
The created date of the alias
Configure Aliases
With Locker Premium, you can adjust how aliases work the way you want.
Click the Edit button next to the alias you want to configure.
Choose the settings you want:
Forward: The alias will forward all emails received to your root address.
Block spam: The alias will block spam and promotional emails. It will only forward important emails to your address.
Block all emails: The alias will stop forwarding emails to your root address.
Reply to Forwarded Emails
When you use your root email to reply to emails addressed to any of your aliases, the recipient will see a reply coming from the alias. Therefore, your root email address remains private.
Open the mailbox of your root address.
You will see emails forwarded from your alias in your inbox. Click that forwarded email and click Reply. Write your response and click Send.
Add Subdomain
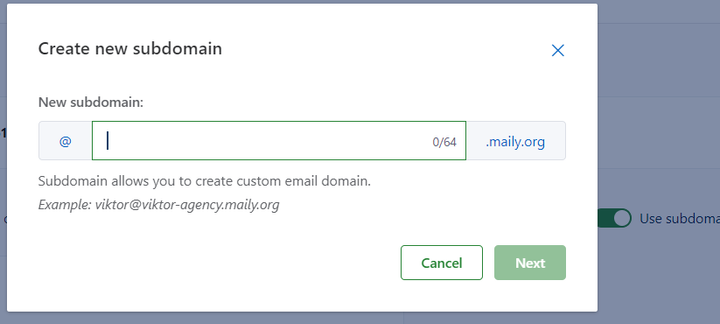
Locker Private Email Premium allows you to add a subdomain to appear more professionals in emails. Here’s how to use the email subdomain in Locker.
Turn on Use subdomain in Locker Private Email Premium.
On the popup appearing, enter the subdomain name to create your new subdomain. The custom subdomain will be @example.maily.org
Click Next. Your subdomain will be automatically created.
Click New alias to create new aliases with the newly-generated subdomain.
In case you want to add a new alias without using your subdomain, simply turn off the Use subdomain toggle. The existing emails associated with the subdomain will not disappear.
However, if you change your current subdomain to a new one, the existing emails associated with the subdomain will be deleted.
Get API Access
Locker Private Email offers simple yet robust APIs for improved efficiency and personalization. You can use the APIs here: Locker Premium Private Email API
On Mobile device
Create, edit and delete unlimited aliases
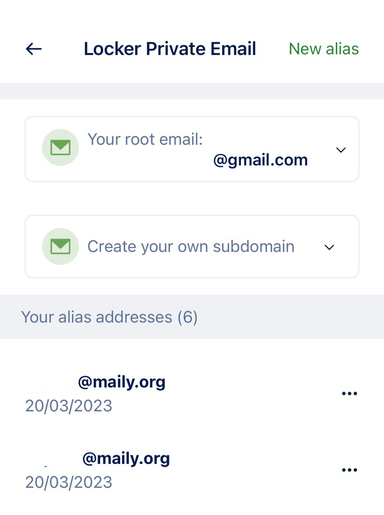
Log in to Locker on your mobile device.
Tap Tools.
Tap Locker Private Email.
You can see all the aliases you have created on the screen and the number of aliases left.
Tap New alias to create a new alias. The system will automatically generate a new email address associated with your root email.
To edit your first generated alias, click on the three-dot icon next to the alias. Tap Edit alias address and change to any name you want. To delete an alias, Tap Delete.
Start using your alias to sign up for a new app or promotion. Any email sent to your alias will be forwarded to your root email.
Manage aliases from the dashboard
From your personal dashboard, you can clearly see all aliases you have created.
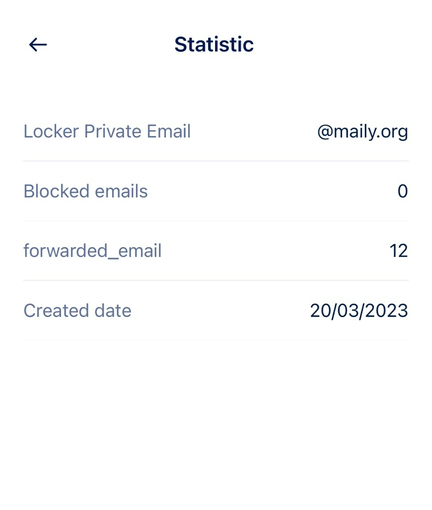
To view the statistics of any alias, tap the three-dot icon next to that alias. Tap Statistic. You can see:
The number of emails forwarded from the alias
The number of emails blocked by the alias
The created date of the alias
Configure Aliases
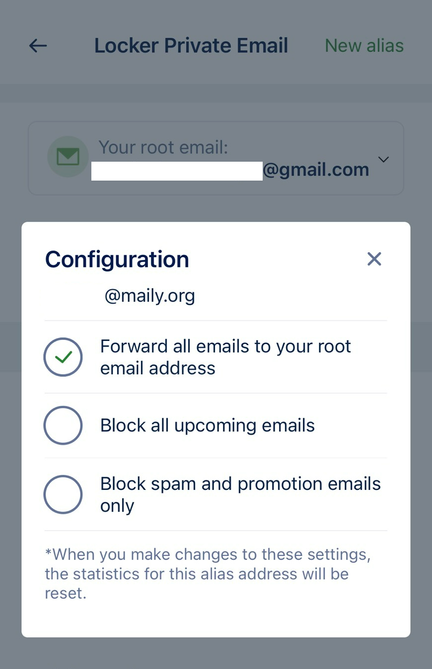
Tap the three-dot icon next to the alias you want to configure.
Select Configuration.
Choose the settings you want:
Forward: The alias will forward all emails received to your root address.
Block spam: The alias will block spam and promotional emails. It will only forward important emails to your address.
Block all emails: The alias will stop forwarding emails to your root address.
Tap anywhere to finish after configuring the alias.
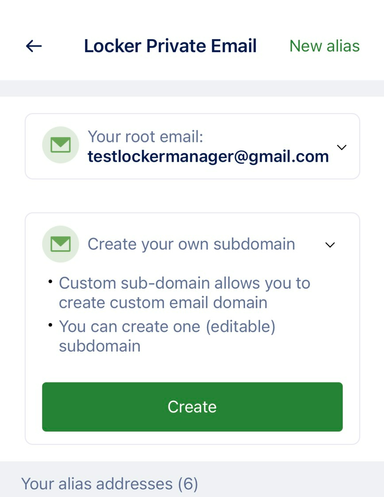
Add Subdomain
Tap on the box Create your own subdomain.
Select Create.
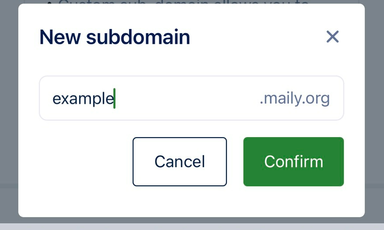
Enter the name of the subdomain.
Tap Confirm.
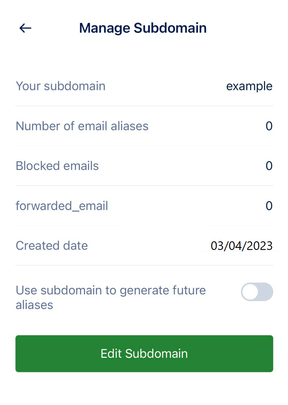
Tap Manage to see the settings for the subdomain. You can see the number of email aliases, blocked emails and forwarded emails associated with this subdomain.
Toggle on the option Use subdomain to generate future aliases.
Click Edit Subdomain if you want to change the name of the subdomain.

 Vietnamese
 No
No Yes
Yes