Locker Web Vault is your central data management hub in the browser, where you can add, save, and organize passwords, credit cards, notes, and other important information.

Import data

If you have already saved login credentials in your browser or other password managers, you can transfer your data directly to Locker in just a few steps.

Google Chrome

Microsoft Edge

Mozilla Firefox

Safari

Password managers

1Password

LastPass

Bitwarden

NordPass

Dashlane

Enpass

KeePass

KeePassX

RoboForm

Keeper

Operating systems & Files

iCloud Keychain

Samsung Pass

Google Sheet / Excel
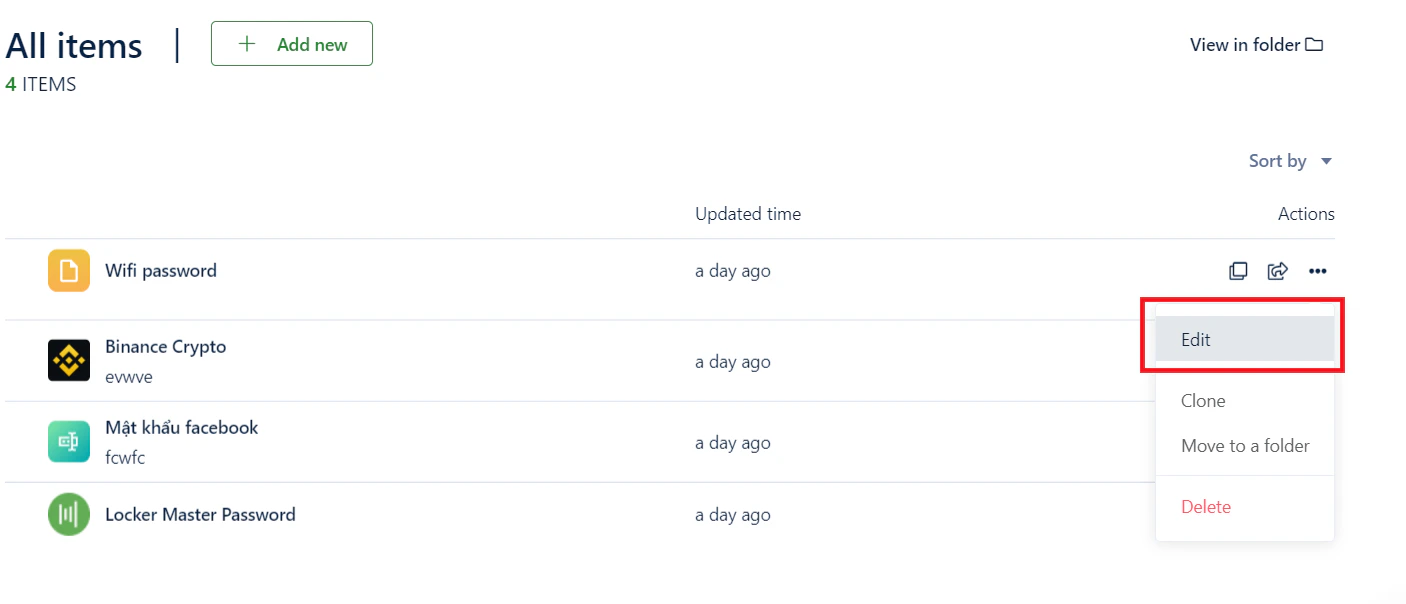
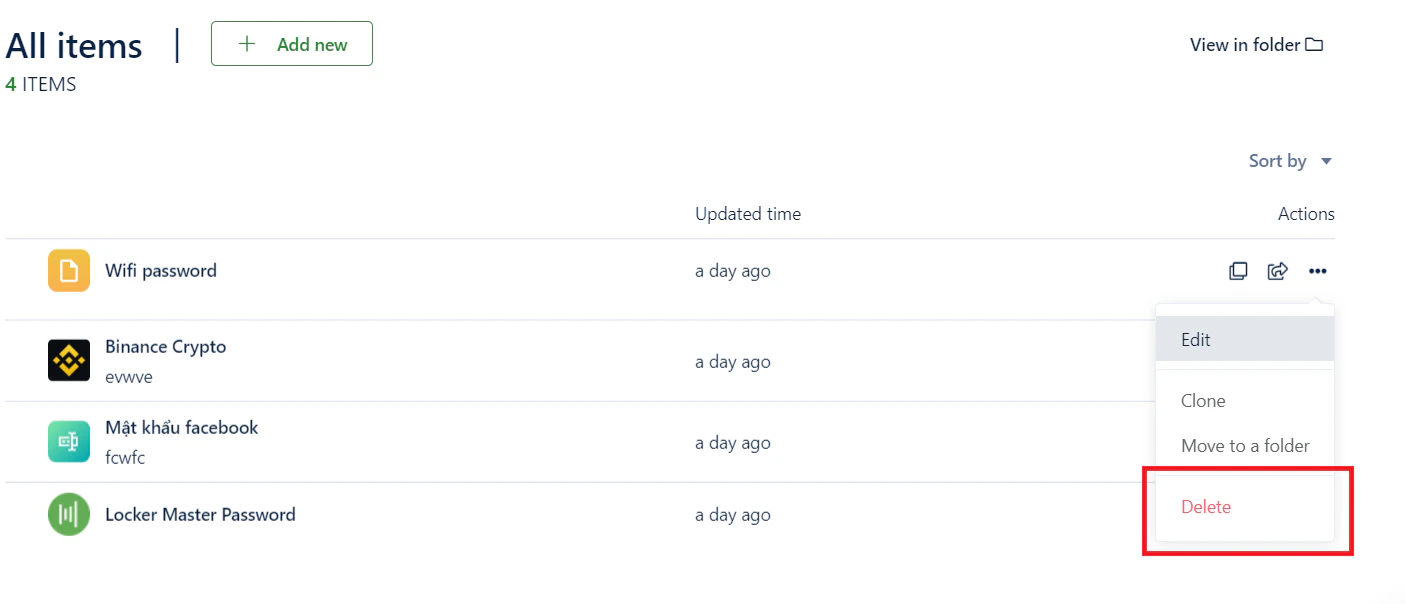

Manage items

In the Vault tab, you can manage all your personal information organized by category.
1

Add a new item

Click 
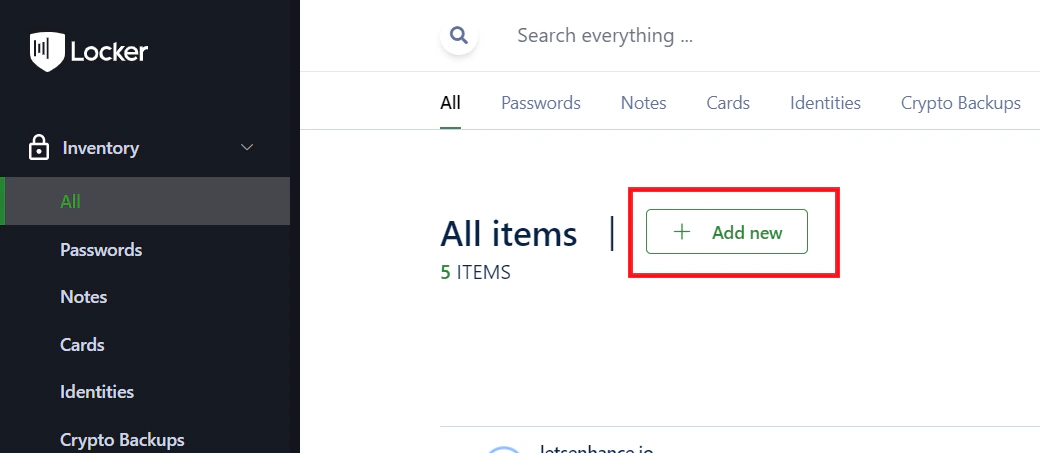
Add New and select the item type (Password, Note, Card, etc.). Enter the details and click Add.Add a new item in Web Vault
2

Edit an item

Hover over the item you want to modify, click the icon, and select Edit.Edit an item
3

Delete an item

You can select Delete from the three-dot menu, or click the Trash icon inside the edit screen.Delete an item

Secure your account

Set up 2FA

To enhance security, you should enable two-factor authentication. Refer to the guide Two-factor authentication for your Locker account for detailed steps.

Lock and unlock

After you finish using the vault, you should lock it to prevent unauthorized access:
1

Lock your account

Click the triangle button next to your username and select Lock Account.Lock your account on Web Vault
2

Unlock

To access your vault again, simply enter your Master Password.