Manage Workspace Members (Self-hosted Version)
On the Self-hosted version, you can create accounts for members in your organization and allow them to access your workspace. This enables your team to collaborate effectively in the software development process.Only the workspace admin can create accounts for new members.
Create a New Member Account
Create an Account
- Log in to your account, click the Settings button on the left navigation bar.
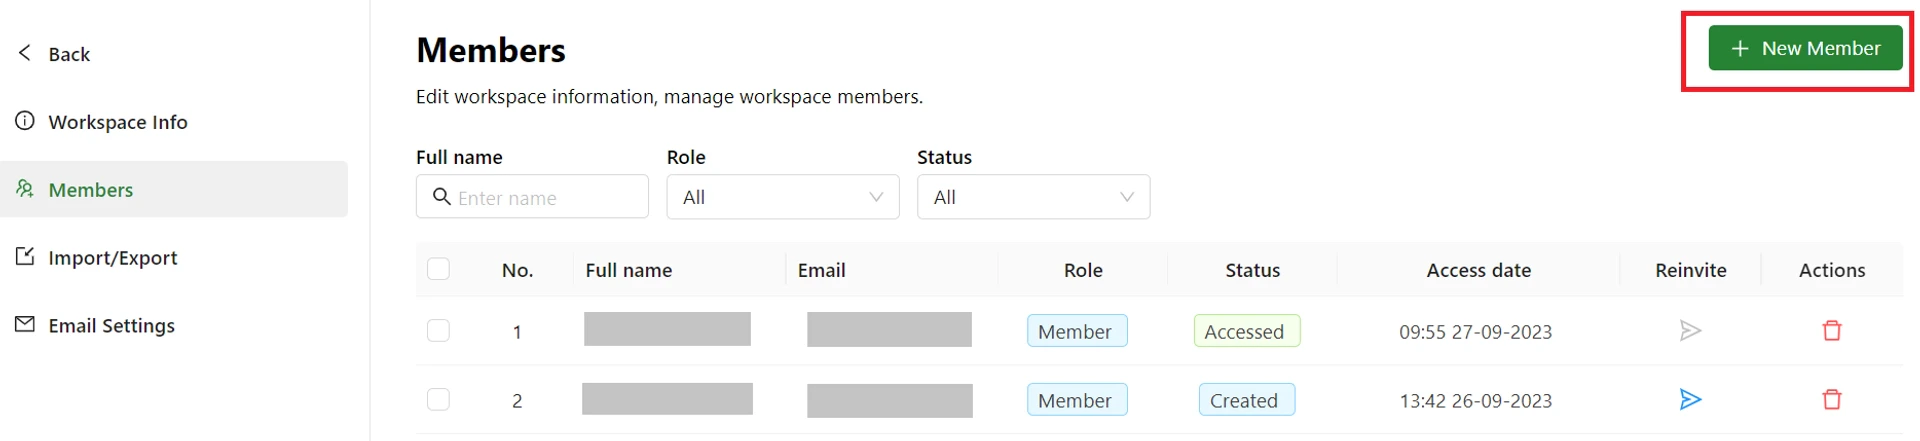
- Open the Members page > click the New member button.
- Enter the email of the new member. You can enter multiple emails at once.
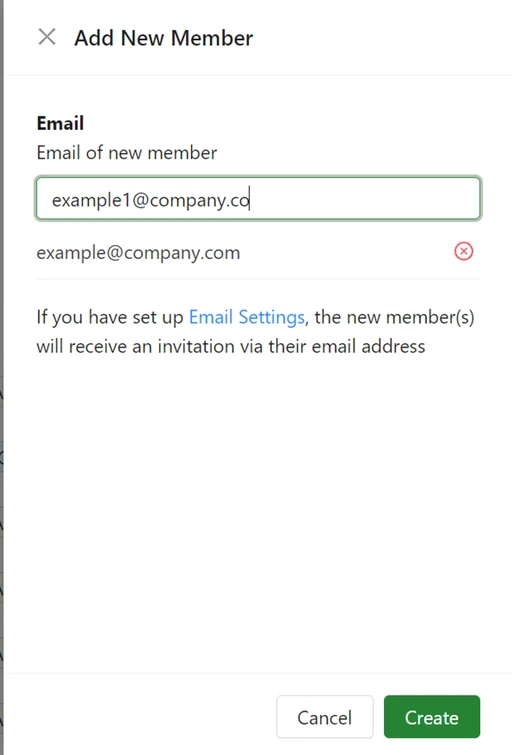
- Click the Create button.
- The new member account will be displayed in the list, including the email and account password.
The account information is only displayed once.
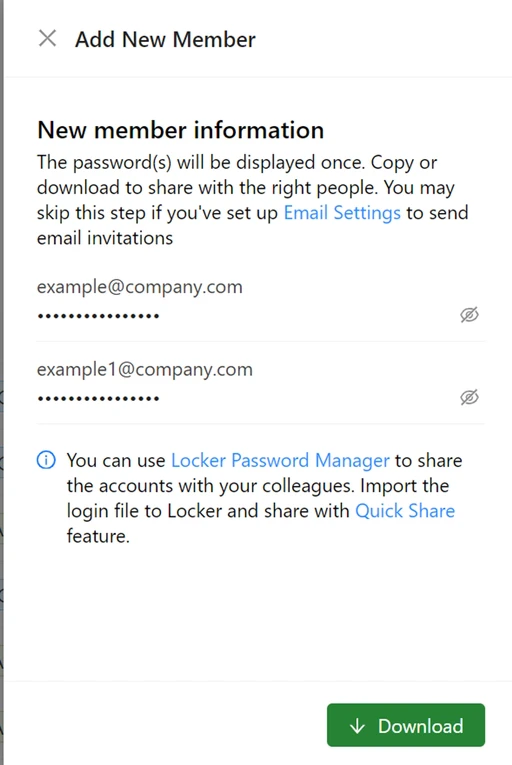
- Copy or download the account information and share it with the member you want.
Access with a Member Account
From an invitation email If you have configured an SMTP email service, your member will receive an invitation via their email address. Below is a guide on how a member accesses their account via email.- Open the invitation email.
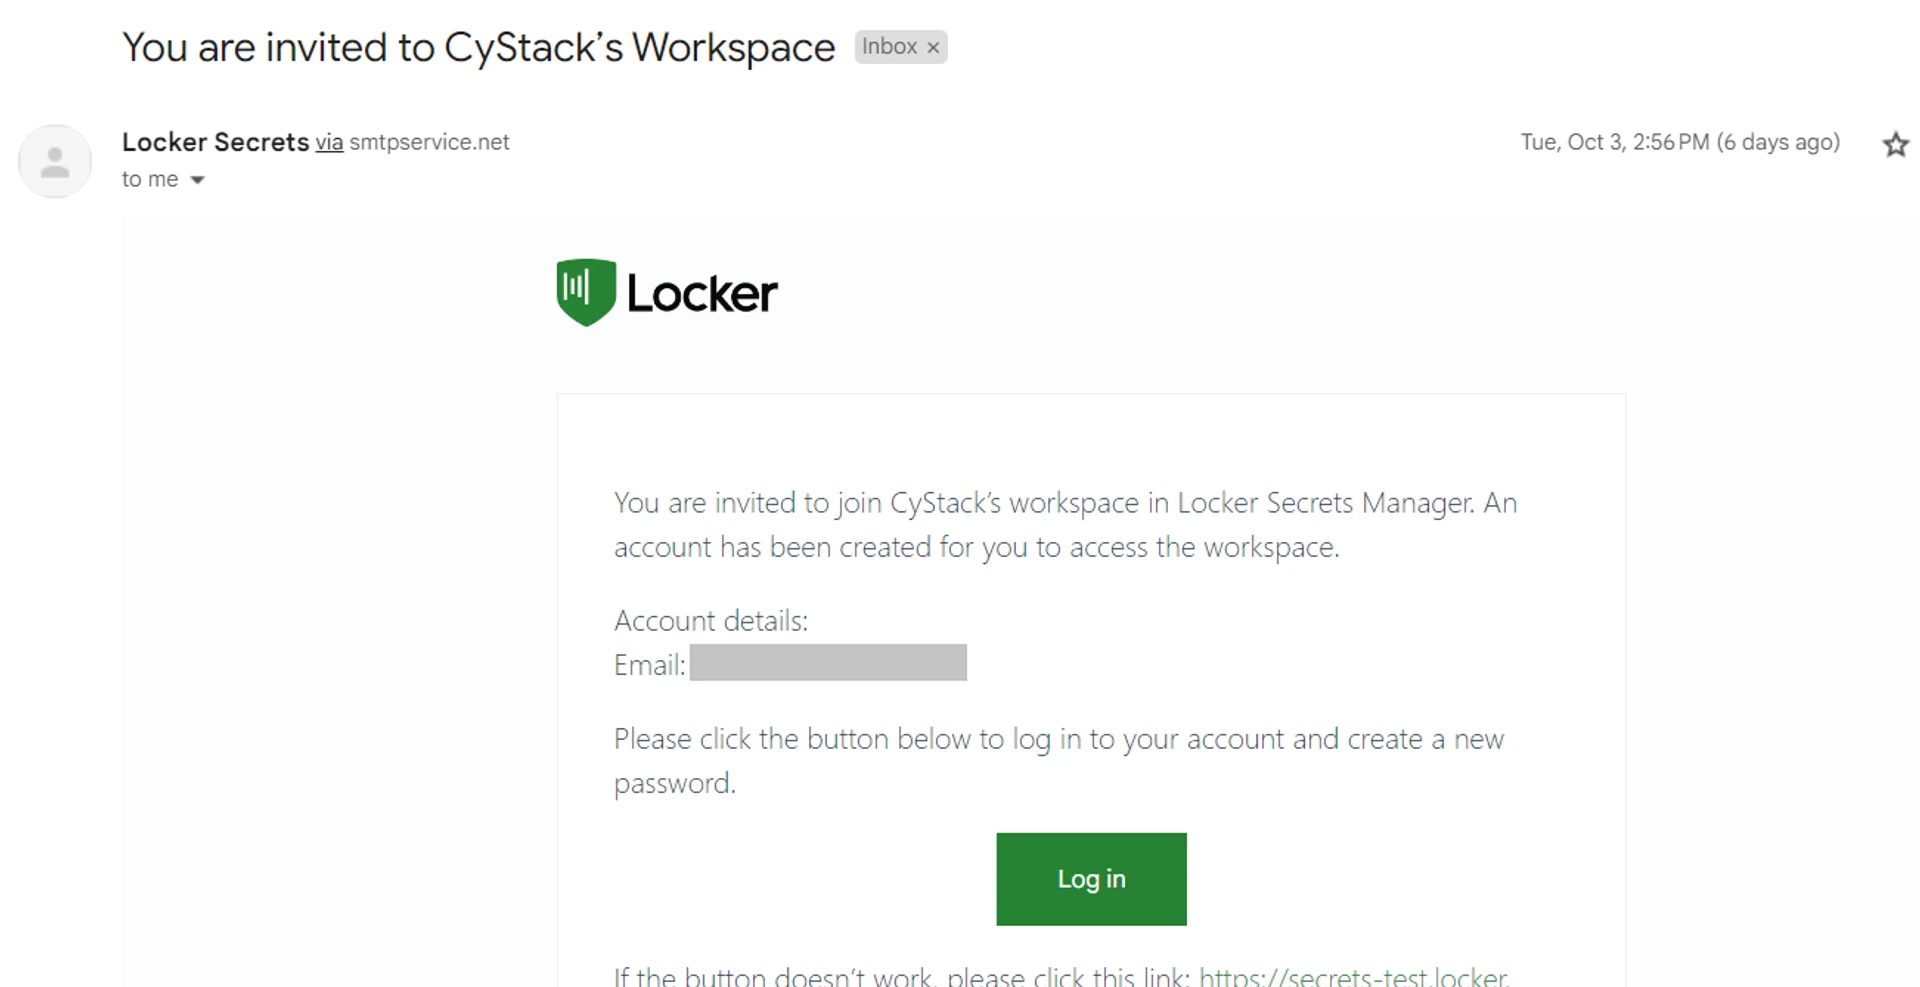
- Click the Log in button. You will be redirected to the Account Setup screen.

- Create a name for the account, then create a new password for the account.
- Click the Update button. Now the member account can be used to access your workspace.

- Create a name for the account, then create a new password for the account.
- Click the Update button. Now the member account can be used to access your workspace.
View Member List
The list of created members will be displayed on the Members screen. You can view the member’s email and other information.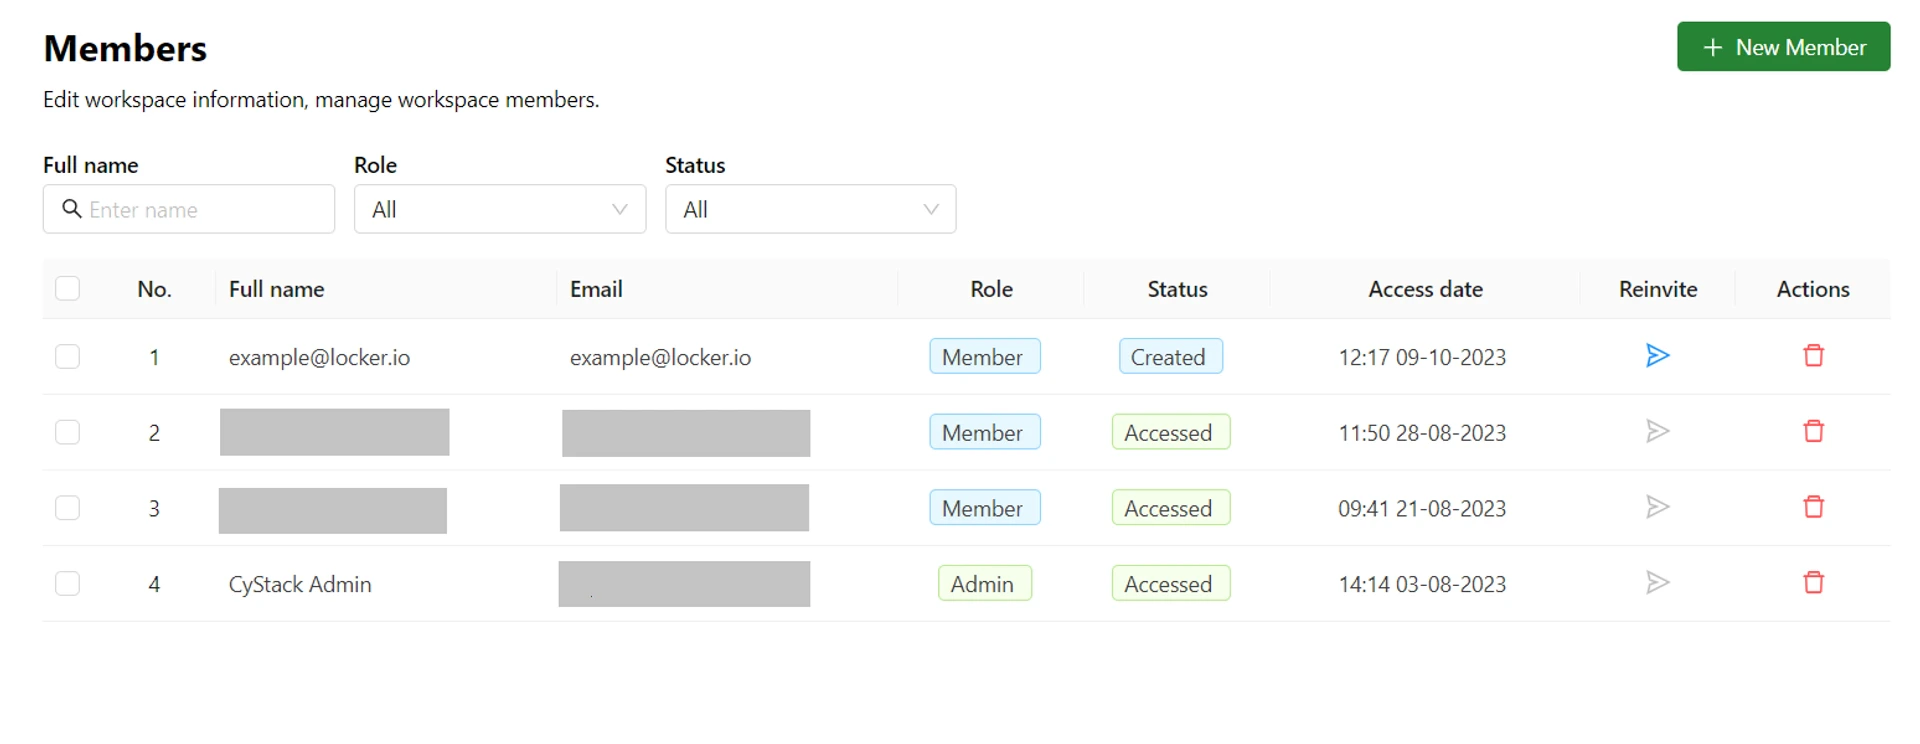
- Created: Your member has not yet logged in to the account.
- Accessed: The account has been logged in and used to access the workspace.
Delete a Member Account
Deleting a member account means permanently removing that member from your workspace. Projects created by that member will still exist if you or another user is also a member of the project.- Go to the Members page as described above.
- Click the Trash icon corresponding to the member you want to delete.
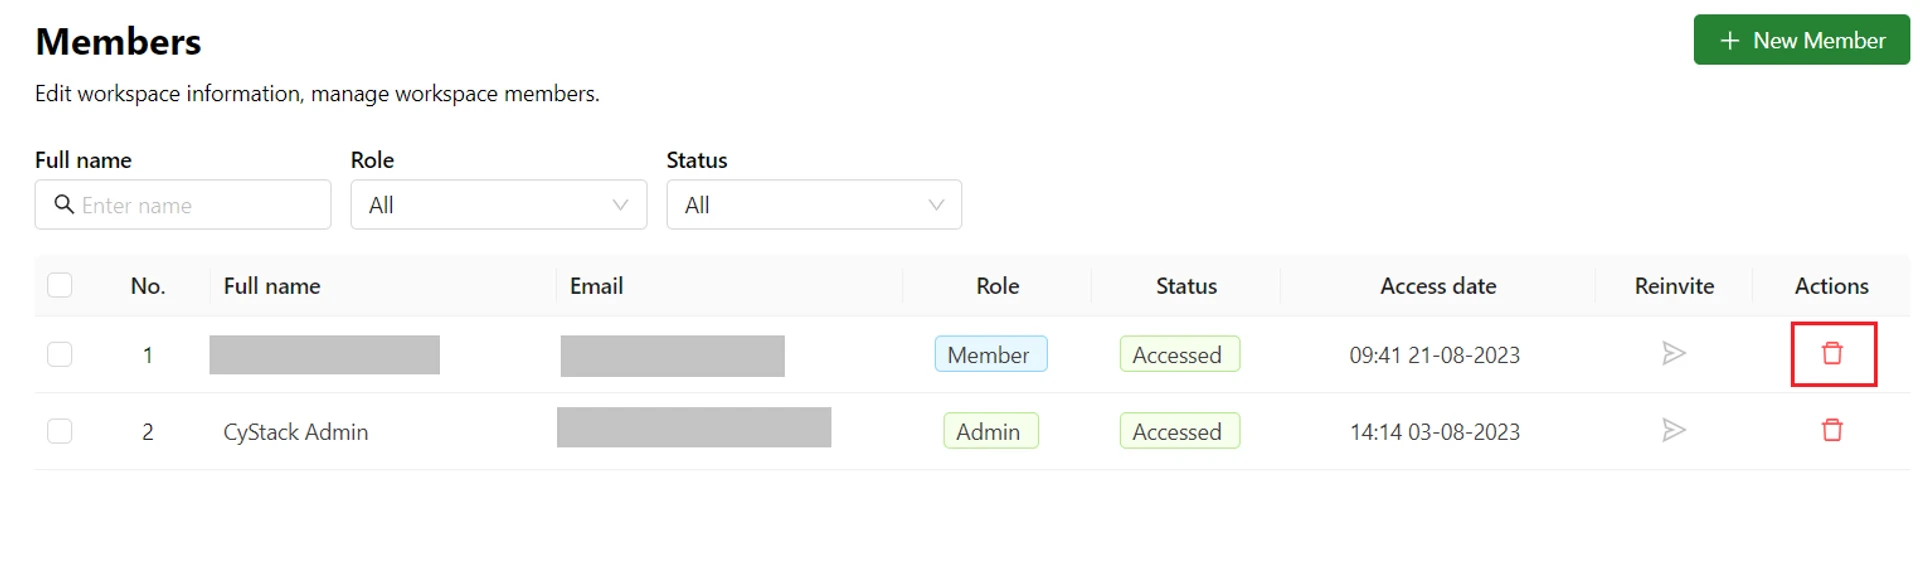
- On the popup that appears, click the Delete button to confirm.