On Web Vault and Desktop App
1
Log in to Locker
Log in to Locker in your browser.
2
Open the Private Email tab
On the left sidebar, click the Private Email tab.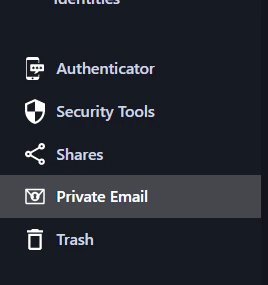
3
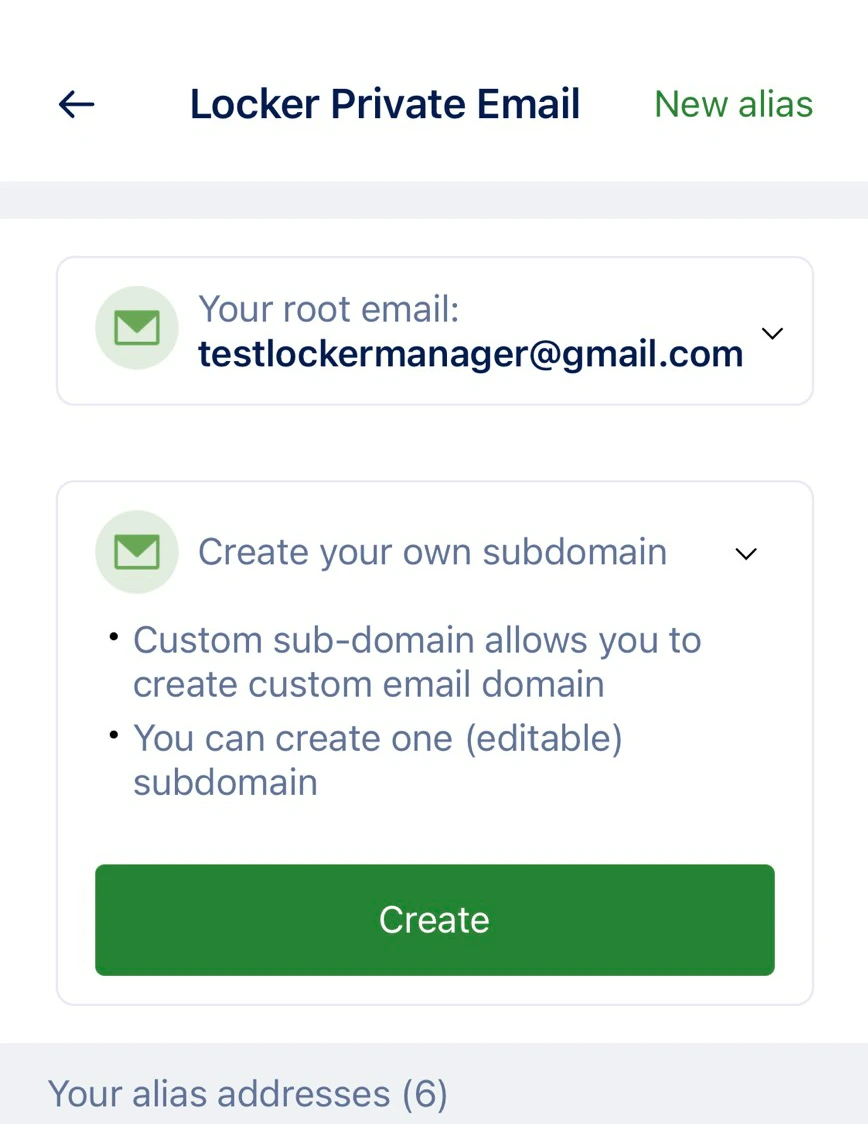
Identify your root email
The email address used to register your Locker account will automatically be identified as your root email.Below your root email, you can see the number of aliases you have created. On the Premium/Family plan, you can create unlimited aliases (one editable alias) and one subdomain.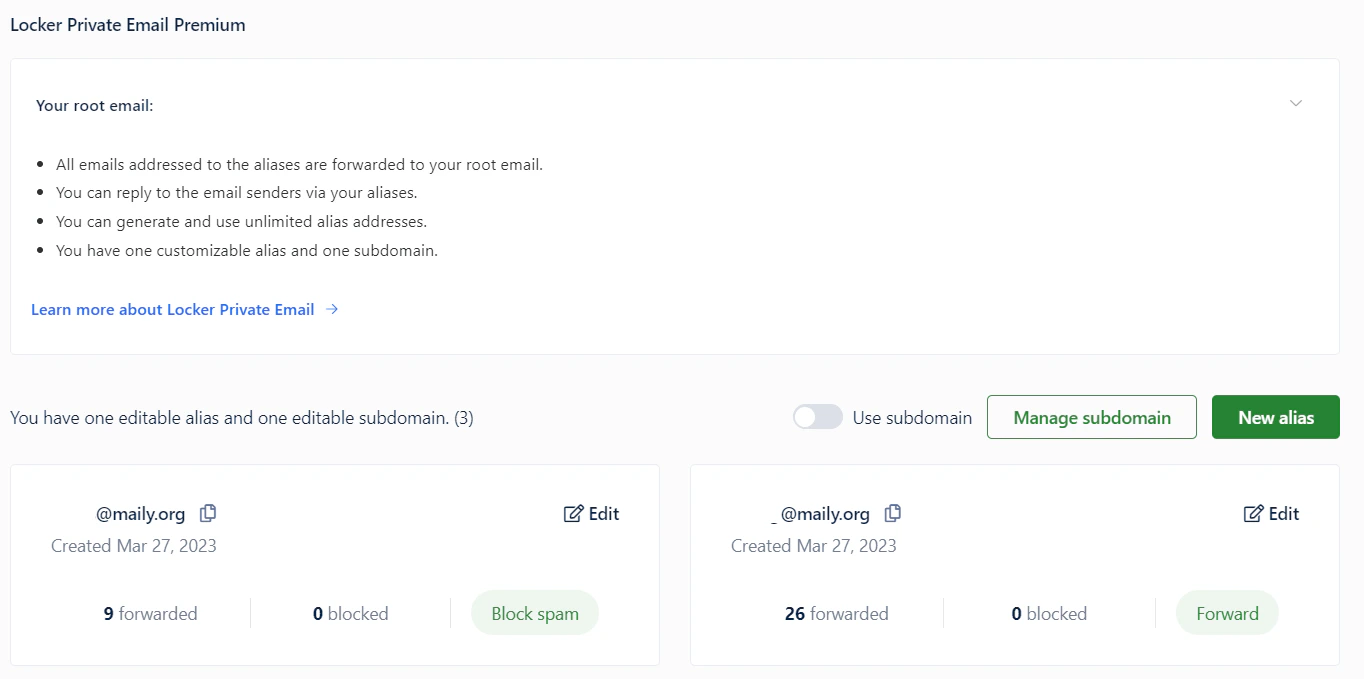
4
Create a new alias
Click Add to create a new alias. The system will automatically generate a new email address linked to your root email.
5
Edit or delete an alias
Click Edit to change your alias username if you wish. To delete an alias, click Delete.
6
Use your alias
Start using your alias to sign up for new apps or promotions. Any email sent to your alias will be forwarded to your root email.
Manage Aliases from the Dashboard
From your personal dashboard, you can clearly see all your aliases along with their statistics, including:- Number of emails forwarded to your root email from the alias
- Number of emails blocked by the alias
- Date the alias was created
Configure an Alias
With Locker Premium, you can adjust how an alias behaves to suit your needs.1
Open alias settings
Click the Edit button next to the alias you want to configure.
2
Select a setting
Choose the setting you want:
- Forward: The alias will forward all received emails to your root email address.
- Block spam: The alias will block spam and promotional emails. It will only forward important emails to your address.
- Block all emails: The alias will stop forwarding emails to your root email address.
Reply to Forwarded Emails
When you use your root email to reply to emails sent to any of your aliases, the recipient will see the reply as coming from that alias. Therefore, your root email address remains private.1
Open your inbox
Open the inbox of your root email address.
2
Reply to the email
You will see forwarded emails from your aliases in your inbox. Click on the forwarded email and click Reply. Write your response and click Send.
On Mobile Devices
1
Log in to Locker
Log in to Locker on your mobile device.
2
Open Tools
Tap Tools.
3
Open Private Email
Tap Private Email.You can see all the aliases you have created on the screen and the number of remaining aliases. For example, 3/5 means you have created 3 aliases and only have 2 remaining.
4
Create a new alias
Tap Add to create a new alias. The system will automatically generate a new email address linked to your root email.On the Premium/Family plan, you can create unlimited aliases (one editable alias) and one subdomain.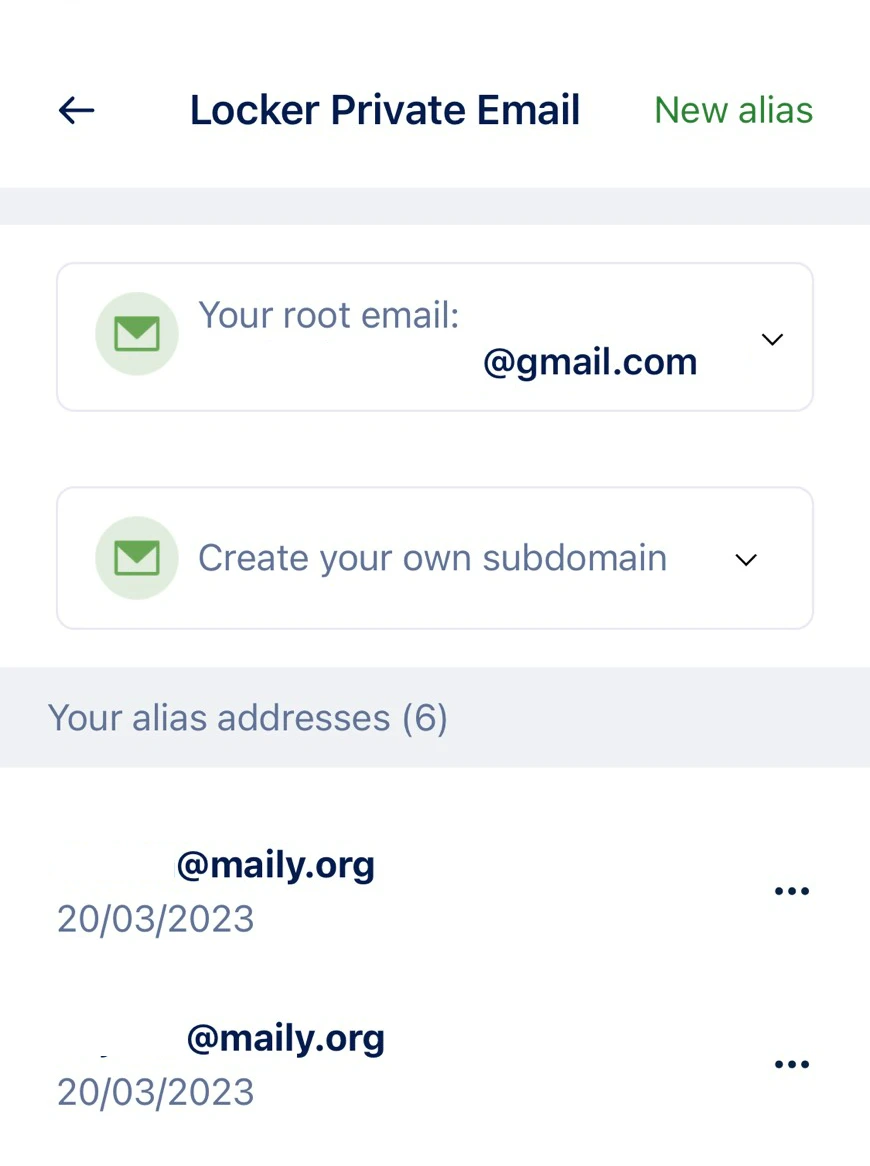
5
Edit or delete an alias
To edit your first created alias, tap the three-dot icon next to it. Tap Edit Email Address and change it to any name you want. To delete an alias, tap Delete.
6
Use your alias
Start using your alias to sign up for new apps or promotions. Any email sent to your alias will be forwarded to your root email.
Manage Aliases from the Dashboard
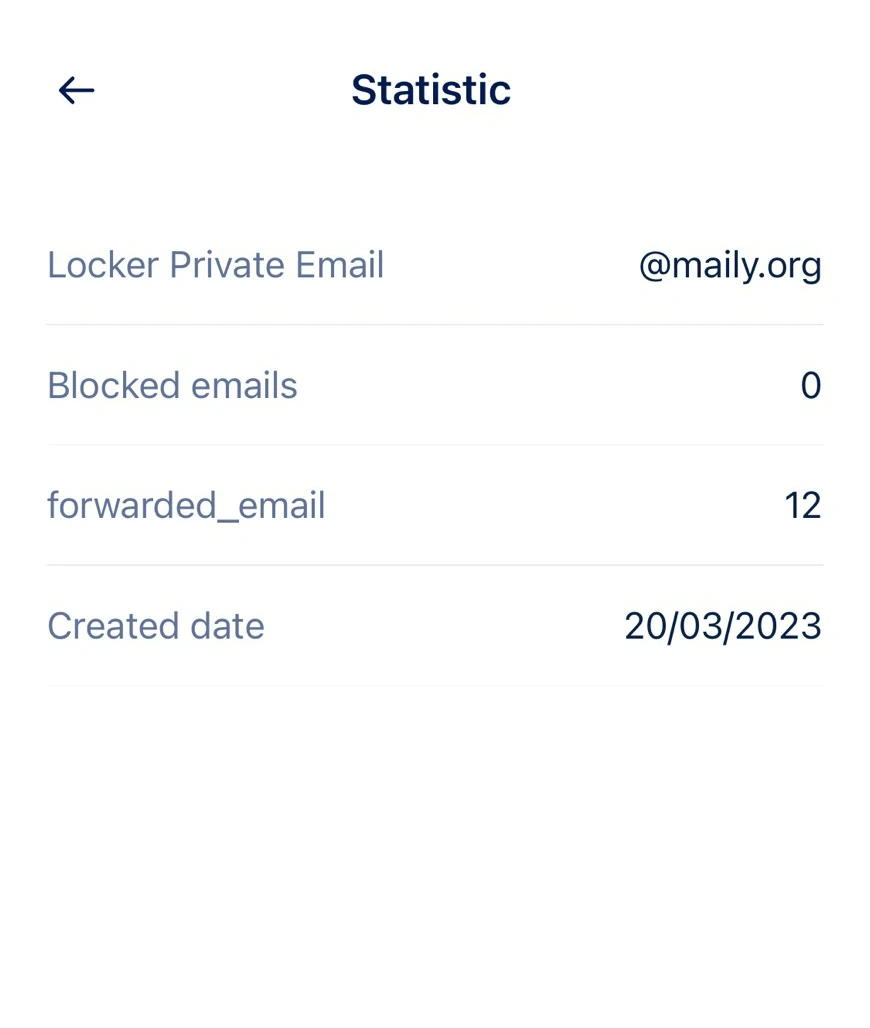
From your personal dashboard, you can clearly see all the aliases you have created. To view the statistics of any alias, tap the three-dot icon next to it. Tap Report. You can see:- Number of emails forwarded from the alias
- Number of emails blocked by the alias
- Date the alias was created
Configure an Alias
1
Open alias settings
Tap the three-dot icon next to the alias you want to configure.
2
Select Customize
Select Customize.
3
Select a setting
Choose the setting you want: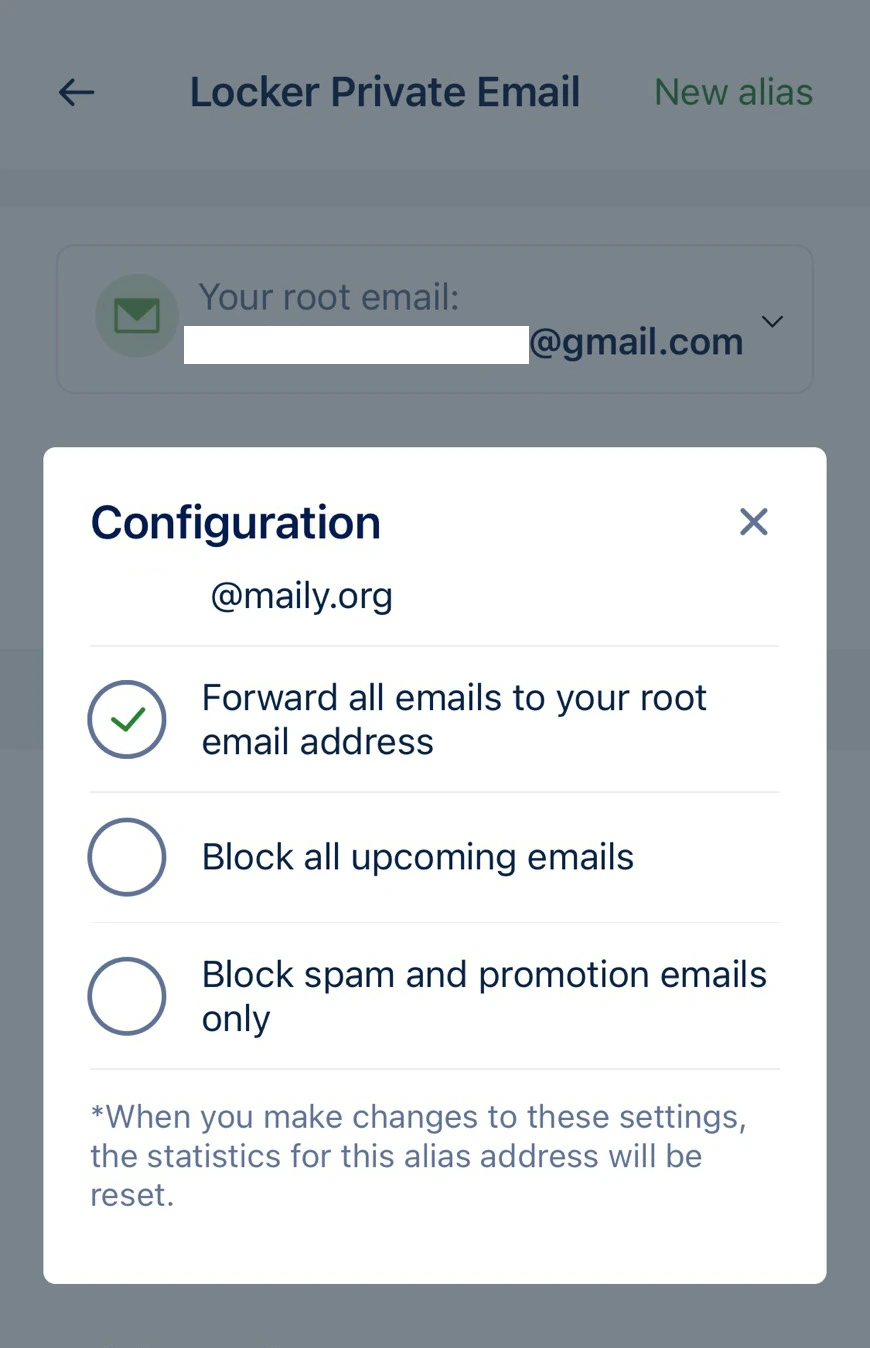
- Forward: The alias will forward all received emails to your root email address.
- Block spam: The alias will block spam and promotional emails. It will only forward important emails to your address.
- Block all emails: The alias will stop forwarding emails to your root email address.
Add a Subdomain
1
Create a subdomain
Tap the Create Subdomain box and select Create.
2
Enter the subdomain
Enter the subdomain name and tap Confirm.
3
Manage the subdomain
Tap Manage to view the subdomain settings. You can see the number of email aliases, blocked emails, and forwarded emails linked to this subdomain.
4
Use the subdomain
Enable the Use this domain to create new addresses option.Click Change Subdomain if you want to change the subdomain name.